
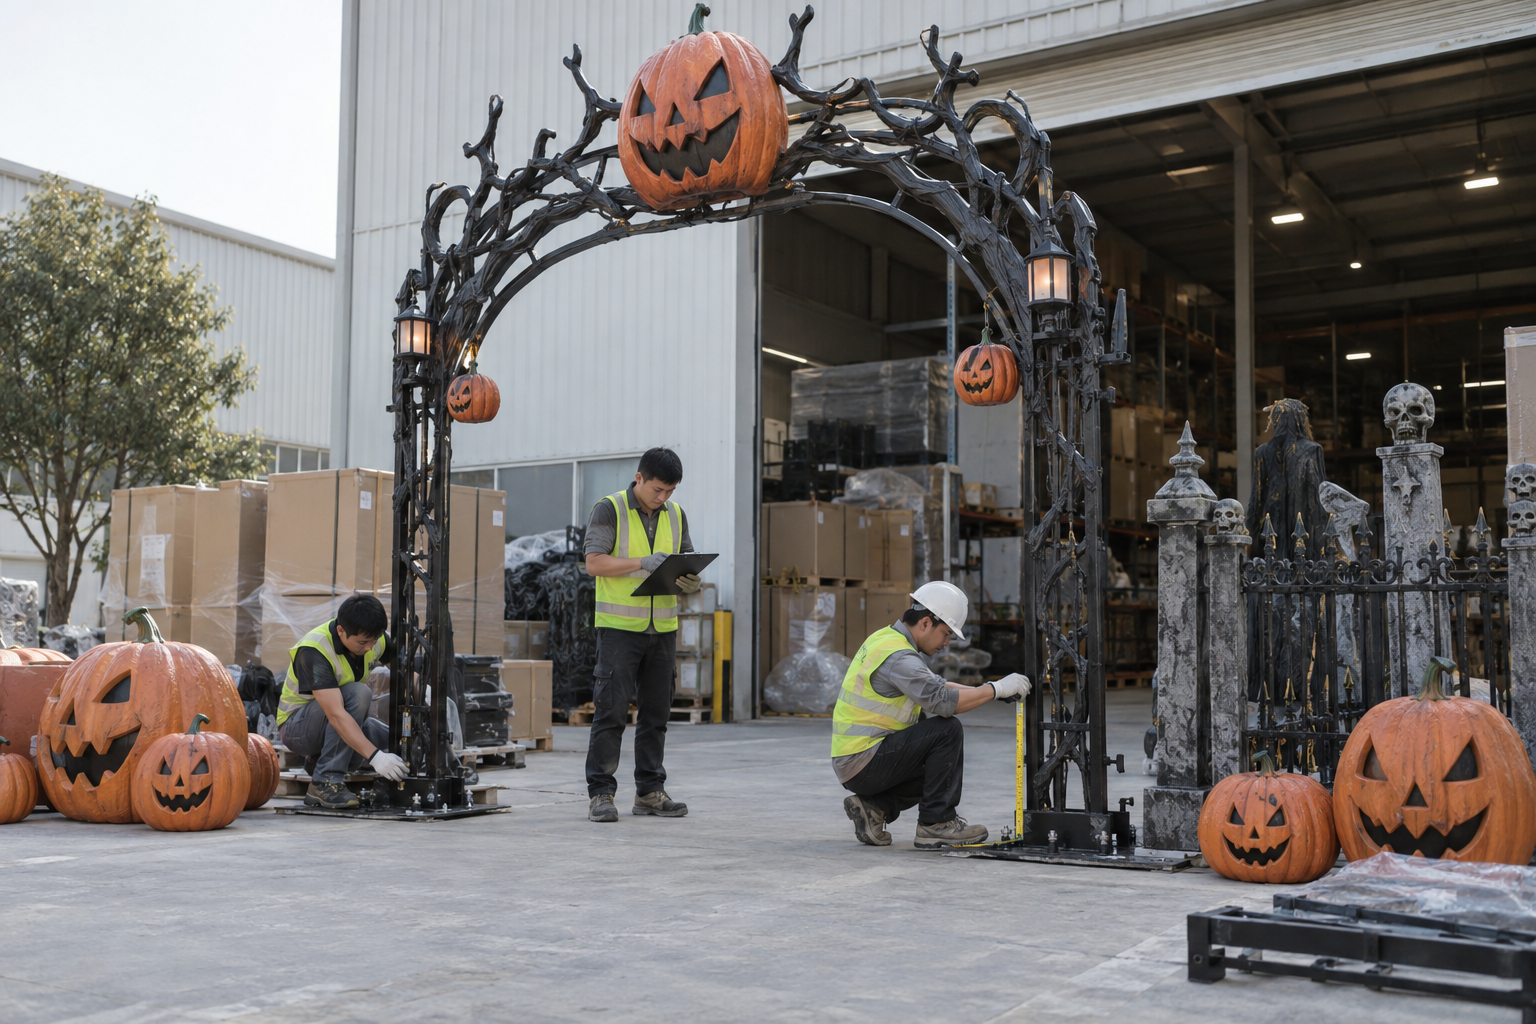
A knock-down Halloween prop arrives as several components rather than one fully assembled object. The format can reduce carton volume, but it also transfers assembly, hardware control and part identification to the receiving team. Choose it when the complete project cost, including setup and future reuse, compares favourably with an assembled alternative.
For an importer, a tall witch, wide spider or entrance arch presents two different footprints: the installed size and the shipping size. A visually large prop may fit a relatively compact carton if its limbs or frame sections detach. Another item may retain most of its volume because its sculpted shell cannot be separated without affecting appearance. The distinction needs drawings and packing information, not a general promise of flat packing.
This guide explains how to buy knock down Halloween props for commercial installations. It uses hypothetical buying examples, not BooAri delivery records. The objective is to make the comparison measurable before sample approval and to give the venue team a configuration it can assemble, operate and store.
Compare the complete delivered configuration
Begin with two quotations for the same visible display: one assembled and one disassembled. Hold the finish, installed dimensions, functions and included accessories constant. Otherwise, a lower carton volume might simply reflect a different product. Ask which components detach, whether tools are included, how joints are concealed and which parts must stay connected during shipment.
A knock-down figure might separate at the base, torso and arms. A spider might have individually removable legs. An arch might use numbered frame sections with decorative panels packed separately. These are design possibilities rather than confirmed BooAri configurations. The supplier should identify the actual proposal in an assembly drawing and component list.
Include the assembly state in the quotation. 'Packed for export' does not identify whether the product arrives ready to stand or needs several hours of preparation. Photographs of an installed sample and a closed carton also leave the critical steps between them invisible. Request a sequence that connects the unpacked components to the finished prop.
Compare shipping size with installed size
Record maximum installed height, width, depth and the occupied base area. Separately record each carton's external dimensions and weight. Do not use the carton measurements as the installed clearance. Detachable parts may also require temporary work space during setup, which matters in a mall corridor or a venue with a narrow service entrance.
Calculate freight savings without inventing a shipping rate
Calculate total packing volume by multiplying the external dimensions of each carton in metres and adding the results. Compare both versions at the same order quantity. A hypothetical assembled carton measuring 1.0 by 0.6 by 0.5 metres occupies 0.30 cubic metres. Two smaller cartons measuring 0.7 by 0.4 by 0.3 metres each occupy 0.168 cubic metres together. The difference is a volume comparison, not a freight quotation.
Freight billing may depend on shipment method, weight, route, minimum charges, consolidation and other conditions. Ask the forwarder to quote both packing lists using the same destination and handling scope. A buyer should not multiply reduced volume by an internet rate and assume that amount will be saved. The total bill may include costs unaffected by carton cube.
Add assembly labour, additional packaging, tools, replacement hardware and any revised handling charge to the comparison. Include a reasonable allowance for the first installation taking longer than a rehearsed factory assembly. If the buyer's staff are already on site and can perform the work, the labour arrangement may favour disassembly. If specialist installers must be booked, the result can change.
For a simple planning example, suppose a shipment quote is lower by 400 monetary units and setup requires 12 extra staff hours at 25 per hour. The remaining difference is 100 before tools, errors or future reuse are considered. These invented figures demonstrate the calculation; they are not shipping prices or productivity claims.
Specify the assembly experience
The quality of flat pack Halloween decorations depends heavily on the joints. Ask whether each connection is reversible, whether left and right parts can be confused, and whether hardware can be accessed after decorative coverings are fitted. A connection that looks tidy in production can be awkward when a venue worker reaches it from a ladder or behind a display.
Specify what the receiving team is expected to provide: workbench space, a second person, ordinary tools or particular lifting equipment. Ask the supplier to state handling points and any components that must not be used as handles. A removable sculpted arm or costume layer is not automatically a suitable lifting point.
For lit or animated products, a separate mechanical assembly does not guarantee simple electrical reconnection. Document mating connectors, labels and cable routing. The buyer should obtain the manufacturer's connection instructions rather than assuming colour or shape identifies compatibility. Local electrical work belongs with appropriately qualified personnel where needed.
Make the instruction usable in a busy venue
Use a short numbered sequence with a photograph at each meaningful stage. Identify the carton containing the base, the bag containing hardware and the moment when a second person is needed. Provide an installed reference that shows the intended pose. Keep decorative adjustment separate from mechanical fastening so staff can distinguish appearance work from structural assembly.
Run an unpacking trial before approving the format
A representative unpacking trial is a useful purchase gate. Start with the actual closed packing configuration rather than a neatly arranged set of parts. Have a person who did not pack the prop follow the supplied instructions. Record missing information, tool requirements and confusing labels alongside elapsed time. A time result is meaningful only with the conditions recorded.
During the trial, photograph the order in which protective materials are removed. Look for parts that become exposed before there is safe space to place them, and for accessories hidden in discarded inserts. If a small connector is essential, make its location clear enough that it will not disappear with loose wrapping during receiving.
Once assembled, inspect the finish near joints, the intended pose and the agreed functions. If a gap is visible from the normal viewing position, improve the joint or finish plan before production rather than relying on the installer to improvise. Assembly acceptance and appearance acceptance should both reference the same product revision.
Retain the recorded trial as a planning reference, but avoid treating one successful assembly as a universal labour standard. Staff experience, available space and handling equipment differ between the factory and the venue. Use the trial to discover requirements and establish a realistic basis for the local schedule.
Plan small parts and spare hardware
Create a bill of components with identifiers that appear on the instructions and packing list. 'Bag of screws' is less useful than a labelled bag linked to a specific connection. Separate decorative accessories from assembly hardware so shortages can be described accurately. Agree which items are counted during shipment inspection.
Spare hardware should match the approved revision. Similar-looking fasteners may differ in thread, length or material, and replacing a missing part by eye can create an unsuitable joint. Ask which spares are supplied, how they are identified and which replacements can be sourced locally with a documented specification.
For repeated seasonal use, include a storage envelope or container for hardware after disassembly. The installation team should return parts to the same labelled kit rather than mixing them with general venue tools. Missing small items can prevent a large decorative piece from being installed even when the visible prop remains in good condition.
Review BooAri's product collection to choose an initial display direction. Send the installed size, receiving constraints and preferred assembly state through the custom project page, then request a packing comparison rather than a general flat-pack price.
Balance protection against packing density
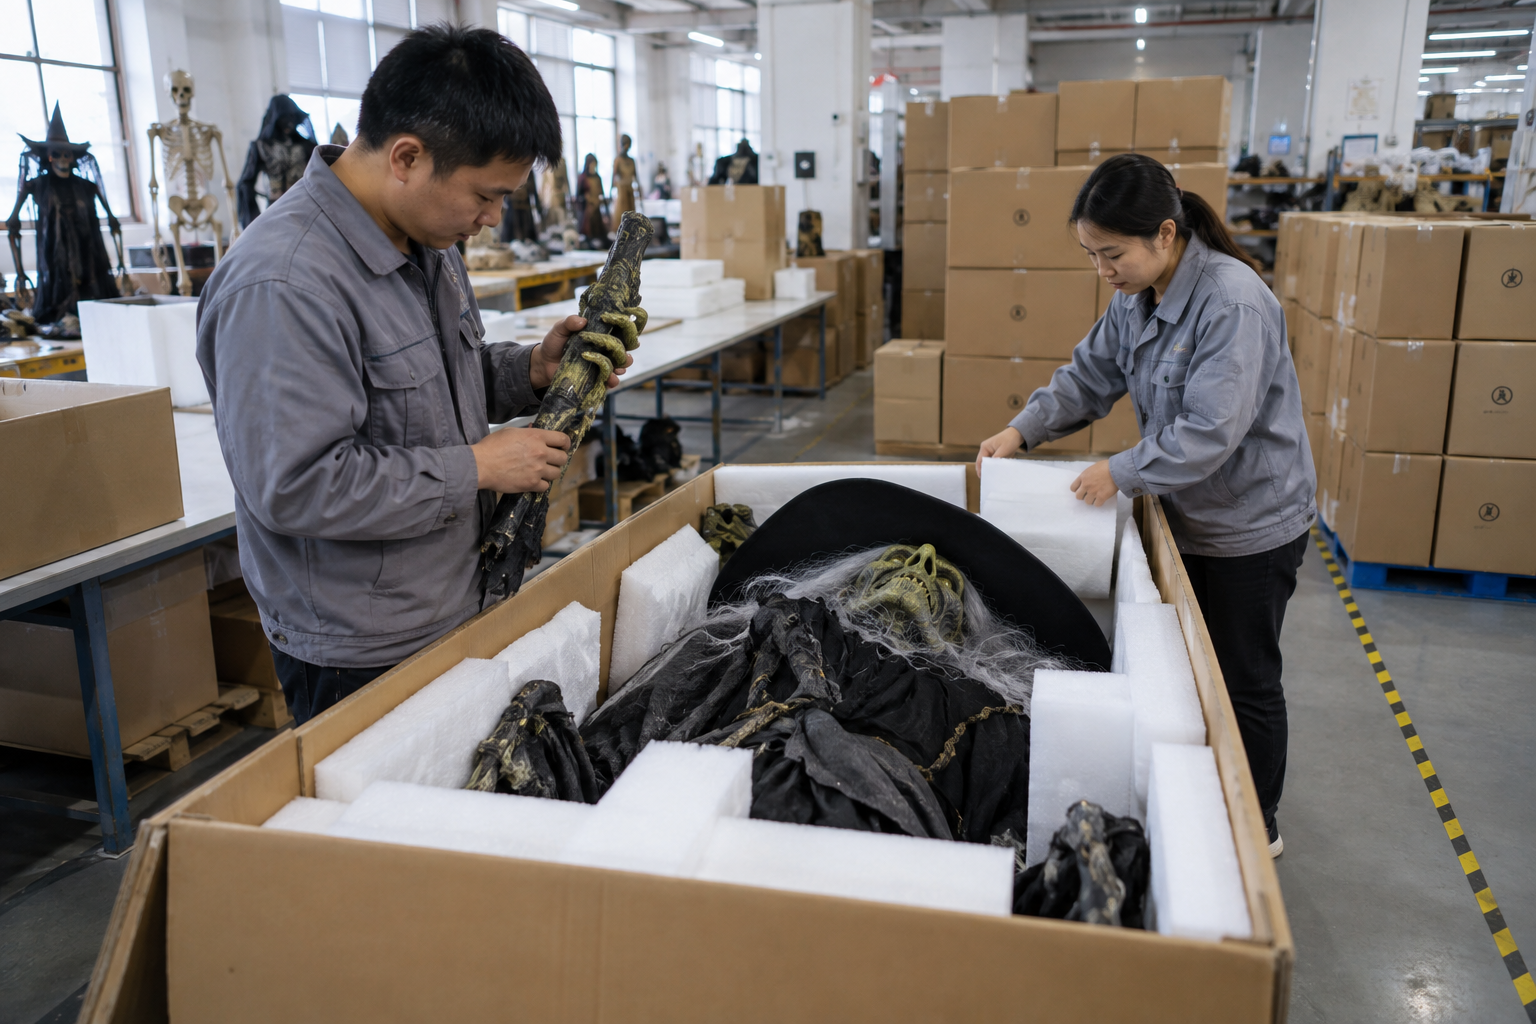
Detaching components can expose fragile ends, connectors and finished surfaces that were protected by the assembled body. Ask how each part is supported inside the carton and whether adjacent pieces can rub during handling. A denser carton is commercially attractive only when the protective arrangement remains appropriate for the route.
Do not approve packing solely because all components fit. Evaluate how the carton is closed, lifted and unpacked. Ask whether heavy frame sections can load delicate sculpted parts when the package is handled in another orientation. The supplier's protective proposal should be tested or reviewed in relation to the actual product and distribution conditions.
The ISTA procedure overview is a starting point for choosing an appropriate packaged-product test. The particular procedure and sample configuration need agreement with a testing provider. This guide does not claim that BooAri's suggested knock-down configuration has passed an ISTA test.
If the product or packing changes after a trial, assess whether the evidence still represents the shipped version. More parts, revised connectors or a different insert may change handling and protection. Keep packing revision and product revision visible together rather than treating the carton as an unrelated purchase.
Evaluate future disassembly and storage
A prop that assembles once is not necessarily convenient to rebuild annually. Ask which joints will be opened after the season, which decorative covers must be removed and which surfaces will rub as parts are separated. Repeated handling can reveal a different weak point from transport or initial installation.
Try a second assembly using the same prototype and instructions after a complete disassembly. Inspect connector fit, labels and the appearance around access points. Record any lost hardware or instructions that became unreadable. The trial reveals practical issues without implying a guaranteed number of reuse cycles.
Storage planning should distinguish rigid components, costume fabric, cables and accessories. A common carton may keep the kit together, while separate protective positions can prevent heavier parts compressing soft materials. Specify the storage state and ask for material-specific care instructions for the actual finish.
Retain the layout, component list and assembly photographs in the venue's records. If a future order adds matching props, these records help the factory understand which configuration the buyer is trying to repeat. They also give new staff a usable reference when the original installation team is unavailable.
Choose the format using a project scorecard
Evaluate six factors: confirmed freight difference, assembly time, available skill, component risk, repeated-use practicality and installed appearance. Weight them according to the project. A one-night event with a short setup window may favour a more assembled shipment, while a distributor serving several venues may prefer modular Halloween prop shipping with clear kit control.
Ask each team to state its constraints before selecting the format. Procurement may prefer smaller cartons; operations may need rapid setup; creative staff may insist on invisible joints. A useful decision reconciles these requirements rather than allowing one department to approve a configuration that another cannot use.
The final order should identify the assembly state, component list, instruction version, packing revision and inspection evidence. Include the agreed handling information in the receiving handoff. This makes disassembled Halloween display props a documented product choice instead of a surprise discovered when cartons arrive.
Buyer worksheet: price the assembled result
For a meaningful comparison, request two quotations for the same visible prop: one shipped assembled and one shipped in defined modules. Ask each supplier to list included packaging, the packed dimensions of every carton, the approved assembly method and the people and tools expected at destination. A cheaper factory price is not automatically a cheaper installed result. Add freight, warehouse handling, destination assembly, inspection and a realistic allowance for lost or damaged small parts according to your own operating records. Keep any assumed labour rate and freight tariff visible in the comparison so another buyer can repeat it.
Next, run a representative unpacking exercise. Start the clock when the identified cartons are available at the intended installation area, not when a specialist has already laid every part out on a bench. Record unpacking, identification, lifting, fastening, costume fitting, connection and the final appearance review separately. Do not turn one trial into a guaranteed installation time for every site. Its value is to show which steps exist and whether they suit the venue's staff. Photograph only the approved process and label temporary tools or fixtures that the final order will not include.
Ask how the design behaves after dismantling. Are fasteners retained or loose? Can two similar modules be swapped by mistake? What must be inspected before a second assembly? If reuse matters, include a disassembly and repacking pass in the same review. The first build can hide label and storage problems that only appear later. Request replacement part identifiers and a support route for worn or missing connections. This changes the decision from a simple carton-volume comparison into a lifecycle decision.
Finally, state the acceptance evidence you need before the balance is due. For example, a buyer may want a measured packing list, photos of protected parts, the approved assembly instructions and a video of the complete erected sample. Match each item to the ordered revision. A dramatic photo of the finished product can establish visual intent, but it cannot prove that every module and tool will arrive or that destination staff can assemble it. Keep these conditions in the purchase specification, not only in a meeting note.
Questions to close before placing the order
Request a packing drawing for every module, including protective inserts, gross mass and carton identity. Ask the supplier to show how a finished sample is unpacked and assembled without hidden prework. Record whether a specialist, lifting equipment or unusual tool is required. These details belong in the quotation because they alter landed cost and the venue's schedule.
Check the visual result after assembly. Module seams, costume joins and cable routing may be acceptable in a factory workshop yet obvious under the intended lighting. Define which joints the visitor can see and which will be hidden by approved scenery. A lower freight figure is only useful if the assembled product still achieves the agreed presentation.
For repeated use, ask for spare identifiers and return-packing instructions. Confirm whether the protective system survives the next dismantling and whether the customer will retain it. If the product is intended for a single installation, state that instead of implying long-term modularity. Keep the signed-off configuration, handling instructions and actual carton dimensions together so the receiving team knows what it ordered.
Frequently asked questions
Are knock-down props always cheaper to import?
No. They may occupy less volume, but the freight charge depends on the shipment and the buyer also incurs setup and kit-management costs. Compare two complete packing lists with a forwarder, then add labour, tools and handling. For some bulky products the reduction is useful; for others it is too small to justify extra work.
What is the most useful sample test?
A closed-carton unpacking and assembly trial is more useful than watching an already prepared prop stand up. Use the supplied instructions, record tools and missing information, and review the finished appearance and functions. Follow it with disassembly if the product is intended for repeated seasonal installations.
Should all hardware be included?
Agree that explicitly in the order. The supplier should identify supplied hardware, any spare allowance and items the local installer must provide. Site-specific anchors may require local selection. Keep product assembly hardware separate from final venue-fixing decisions, and identify replacements by documented specifications rather than visual similarity.
Can animated props use flat-pack construction?
Some designs can separate at selected points, but movement, cables and access may limit the approach. Ask for the actual configuration and connection instructions. The mechanical and electrical reconnection sequence should be demonstrated for the approved revision. Do not infer modularity from a photograph or from another model in the range.
Conclusion
Knock-down construction works when reduced packing volume comes with manageable assembly and traceable components. Approve the format using a real unpacking trial, a complete quote and a venue-specific labour plan. The most valuable record connects the closed cartons, individual parts and installed display so the receiving team can repeat the factory's demonstrated sequence.
Send BooAri the display footprint, target quantity, destination, setup window and preferred packing format. Ask for an assembled-versus-disassembled proposal with component identification and inspection points. Start with the factory overview and use the enquiry form to describe your receiving constraints.
Further reading
Use these external resources alongside your local market, venue and professional safety requirements:
READY TO START A PROJECT?